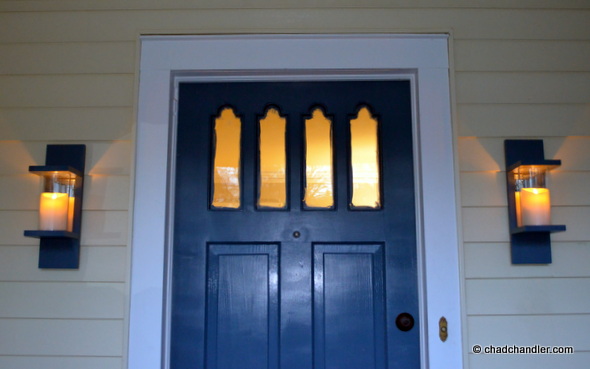
The wife and I recently moved to a new house in the same neighborhood. As part of the remodeling process, we made some changes to the front porch. The porch has an overhead light, but no sconces by the doorway. I’ve already spent enough money on electrical work (only half of the wiring in the house was updated at the time of purchase), so I didn’t want to spend more than necessary to get a little more light and decoration outside. As a work-around, I built a set of electric sconces that flank the front door.
This DIY project was really easy to make. It only required some leftover wood scraps and a few online purchases. These are the steps involved.
First, I bought two 3½” x 5″ flameless moving wick candles. If you haven’t seen these before, you’re in for a surprise. You have to really look closely to see that they’re not real candles with real flames. They’re even coated with wax. Then I bought two 8″ x 4″ glass hurricanes to encase the candles. It took me a while to source them, but these glass cylinders look like they were made specifically for the candles. They almost look like jar candles that have burned down a few inches.
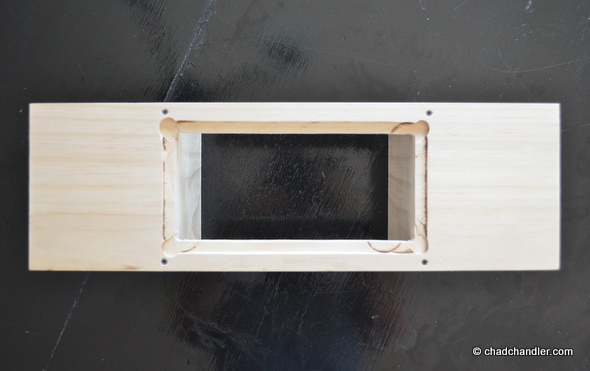
Next, I cut one 1″ x 6″ x 6′ piece of select pine into two 17½” lengths. In each slat, I cut out a rectangle that was 8″ x 3½” in the center. Then, I routed the back of the cutout ¼” deep and had 1/8″ mirrors cut to fit.
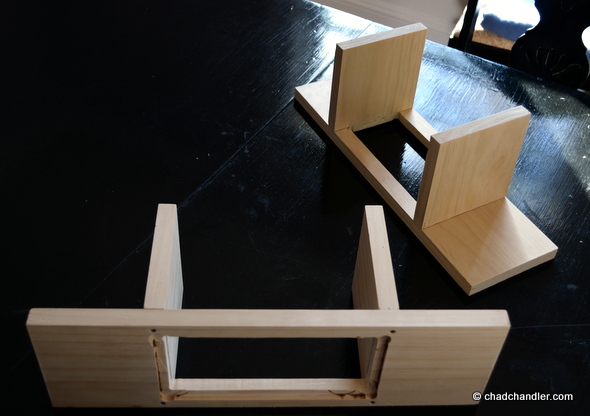
Finally, I cut four pieces of the leftover 1″ x 6″ x 6′ pine into 6″ squares to act as shelf pieces. I attached them just above and below the mirror opening, leaving exactly 8″ in between for the glass hurricanes. You want this to be a snug fit so that the glass and the candles don’t shift. I glued them into place and then later used some thin head screws to make sure they won’t budge.
Next, I painted the sconces. It’s easier to get the color into all of the corners before the mirrors are inserted. Finally, I inserted the mirrors and used clear caulk to set them into place.
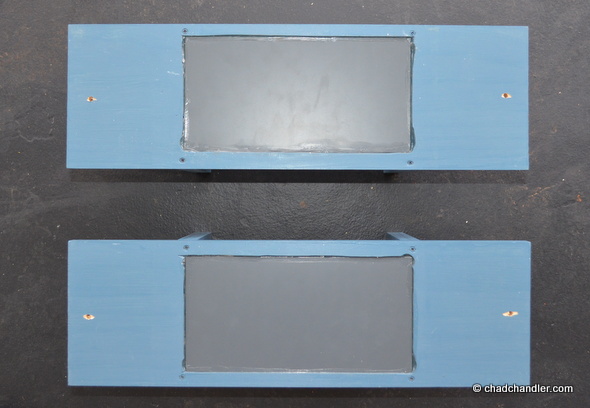
If you don’t have a router, then don’t bother cutting the rectangles out of the boards at all. Just glue the mirror to the middle of the piece of wood and then attach the shelf pieces above and below it. It’ll look fine and give you the same effect. I screwed these straight into the siding on either side of the front door and filled and painted the screw holes, but you could drill holes in the back of each sconce and hang them if you wish.
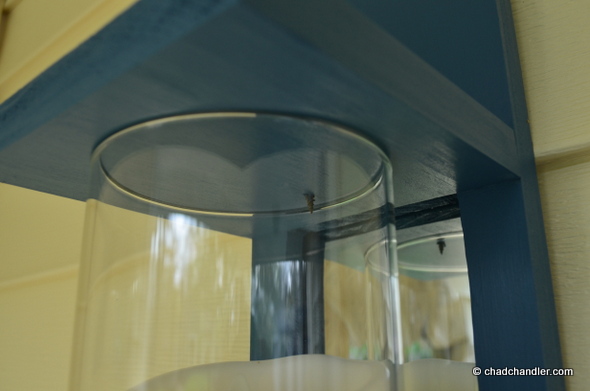
Even though the wood is labeled as being 1″ thick, it’s really only 3/4″. I added a counter-sunk 1″ screw to the top. This keeps the hurricane and candle from sliding around in case of an accident (or being stolen on a whim). I’ll just have to unscrew it a little the few times each year when I have to change the batteries.
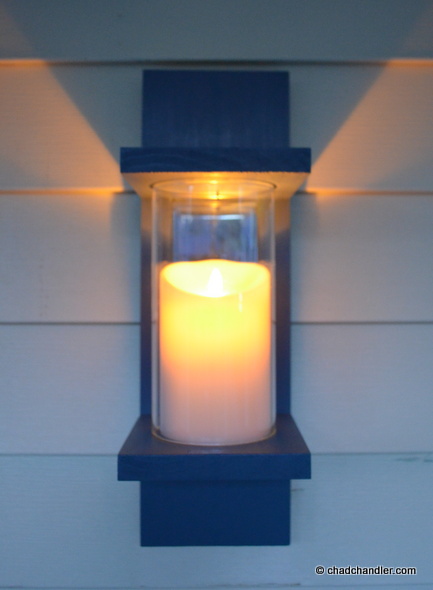
Finally, I put batteries in the candles and set them to turn on at sunset each day. They look like real candles, don’t they?
These electric candles by Luminara have built-in timers. The lights run for 5 hours from whatever time they were set to “timer.” Then they’re off for the next 19 hours. This cycle repeats daily. If you want to adjust the time every few months as the sun sets sooner or later, simply turn them off and reset them to “timer” at whatever time you want them to activate each evening. It takes all of ten seconds. When the batteries get low, the lights start to blink and you change out the batteries. I’ll have to report back on how long the batteries last with the candles set to come on for five hours every night.
Conversely, you can just leave the candles in the “on” position and buy a $10 remote control to turn them on and off whenever you please.
This project added up to around $125 in all. That’s a whole lot cheaper than paying an electrician to install expensive, outdoor wall sconces. The candles turn on and off by themselves and they look absolutely authentic. The best part is, these sconces could be used inside or outside and will go with us when we move. I’m tired of building things that stay with the new buyers.


