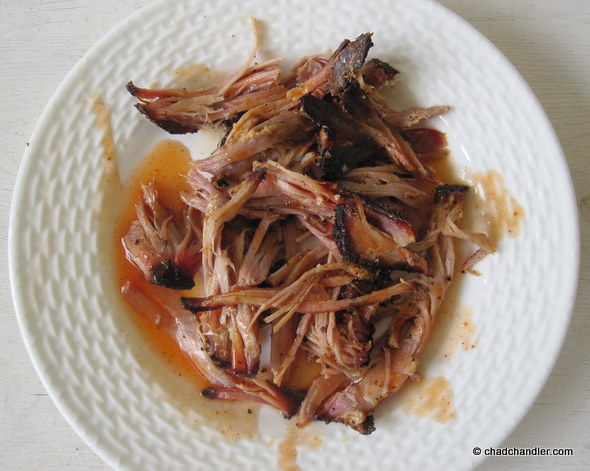
The Basics
Let’s get one thing straight; the words “grilling” and “barbecuing” are not interchangeable. In the south, if you invite people to a “barbecue,” they expect to be served BBQ pork. If you invite them to come over and “grill out” at your house, then they expect to be served hamburgers and hot dogs. Barbecuing is cooking at a low temperature for a long time with a little smoke.
Over the past dozen years, I’ve fine-tuned the art and science of barbecuing pork. In that time, I’ve hopped on just about every bandwagon and fad that’s supposed to make barbecue simpler or better. I realize now that most people’s deviations are worthless. Basically, you have countless people trying to put their own personal spin on the same old dish just so they can claim to have added some sort of value. As such, they make the process senselessly complicated, adding unnecessary steps and costs to what should be a cheap and simple, albeit time-consuming, meal.
Barbecue, like most other traditional, regional foods, is a peasant dish. It was borne out of the same need to make undesirable foods plentiful and palatable that led to the creation of coq au vin, borscht, polenta, pizza, grits, pho, et al. It shouldn’t be very complicated to make today, because its creators didn’t have a lot of ingredients to work with in the first place. So, like I’ve done with everything from gumbo to pork chops to piccata, I’ve simplified the recipe and the cooking process to its simplest form.
I try to keep my smoker between 210-230°. At that temperature, it takes around 90 minutes per pound to cook. Since an 8 pound shoulder takes a minimum of 12 hours to cook, I usually start it the afternoon before I’m going to serve it. Barbecue is not an impulse meal, and if someone shows you how you can do it in a fraction of the time, then you’re not making barbecue anymore; you’re making something else.
Prep Work
An 8 pound pork shoulder (a.k.a. Boston butt) will yield at least 2 BBQ sandwiches for a dozen people. When you buy it, it’ll probably have a fat cap on it. Many people argue that you should cook the pork shoulder fat-side-up so it bastes the meat as it renders. From my experience, this is a myth. The fat doesn’t break down all that much, so you end up with a greasy bark (the hard crust on the outside). Plus there’s already plenty of fat in a Boston butt, so I just cut it off.
I don’t spend any time trimming the meat beyond that. I just rub it down with a handful of kosher salt and let it sit on a rack on a baking pan for an hour or so. The salt draws water to the surface and then the water dissolves the salt and pulls the saline solution back into the meat. This is basically a lazy man’s brine. I do this with all of the meat I cook. It helps to keep the muscle fibers tender and moist during the cooking process. You need to bring the pork to room temperature anyway, so you might as well salt it while it’s sitting out.
While the meat is “salting,” I usually go out and fill my chimney starter with charcoal and light it. I use lump charcoal because it’s getting harder to find briquettes that don’t have some sort of rapid-light chemicals in them. That means that if I add more briquettes later on, they’ll impart a lighter-fluid taste. We can’t have that. The drawback to lump charcoal is that it heats unevenly and burns out faster than briquettes. Just use whichever you prefer; it’s not that big of a deal.
I don’t have a real smoker, so I just use the ubiquitous red and black grill that adorns so many suburban backyards.
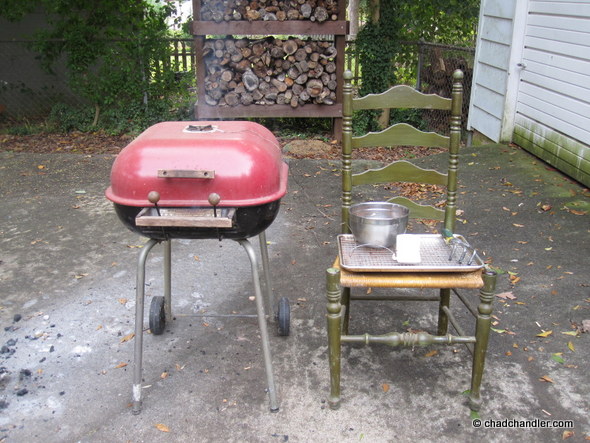
I put a foil pan in the back of the grill and add a little water to it. This helps to keep the inside of the grill a little moist, but mostly it catches the dripping fat and prevents flare-ups. Then I pour the hot coals into the front half of the grill, spread them evenly with a garden hoe, and add the grate on top.
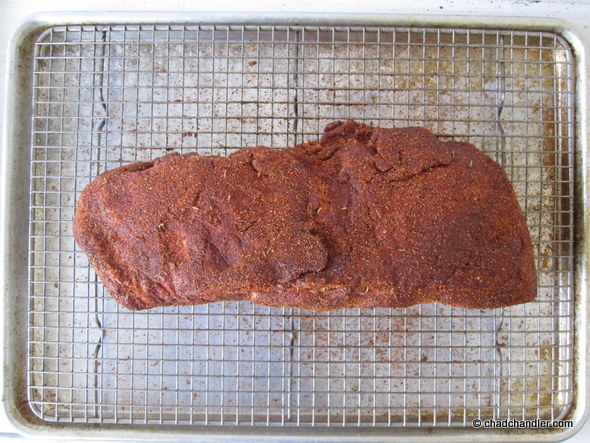
While the grate is heating up, I toss some wood chips into a bowl with some water and rub the pork with my homemade spice rub (you can get a batch recipe here).
Memphis-Style Dry Rub
- 1/4 cup (4 tablespoons) sweet or smoked paprika
- 1/4 cup light brown sugar, packed
- 2 tablespoons table salt
- 1 tablespoon plus 1 teaspoon chili powder
- 1 tablespoon garlic powder
- 1 tablespoon onion powder
- 1 tablespoon black pepper
- 2 teaspoons cayenne
- 1 teaspoon dried thyme
You could skip this step if you really wanted to make the simplest recipe, but I prefer Memphis-style (dry-rubbed) barbecue. I’ve found that the easiest way to ruin barbecue is to constantly baste it with a Midwestern-style sauce. The sugar inevitably burns and the bark ends up tasting bitter. I don’t use any sauce throughout the cooking process. It’s unnecessary.
Adding That Smoky Flavor
Next, I walk the pork out to the grill and clean the grate. Then I plop the meat over the water pan, sprinkle a handful of dry and damp wood chips over the hot coals, and close the lid. I insert a digital thermometer through the top vent to measure the temperature. I adjust the front and back vents to maintain an even 225°. By doing it that way, the hot coals pull in air from the front vent and smoke is forced around the pork and out the back vent.
A lot of people say that you want the wood chips to smoke but not burn, otherwise the burnt taste will be off-putting. That’s not true. It’s doesn’t even make sense. Smoke is not the same as steam. Other people say that there’s no point in soaking wood chips. That’s not true either. By adding both wet and dry chips, I get smoke out of the dry chips while the wet ones are slowly releasing their moisture. Once they’ve dried out, they catch fire and smoke as well. It’s a delayed reaction that allows me to get a longer smoke without opening the lid.

Be prepared to hang around the grill for up to four hours. While it’s out on the grill, I add more wood chips as necessary depending on the size of the chips. After the first hour, I rotate the pork a half-turn and pour a little apple juice over it. After the second hour, I flip the meat over and douse it with some more apple juice. After the third hour, I rotate the pork again and hit it with a little more apple juice. After four hours, I take the pork inside.
I usually have to add more coals to the grill at least once to maintain the temperature. I just fire them up in the chimney starter and add them around the two-hour mark by lifting the grate and pouring them in. After four hours, the pork has absorbed all of the smoke flavor that it’s going to take, so the shoulder goes into the oven. If you keep smoking it uncovered, it can make the bark start to taste a little acrid. It’s not that big of a deal, but why waste the charcoal and wood? Once it’s in the oven, your work is pretty much done.
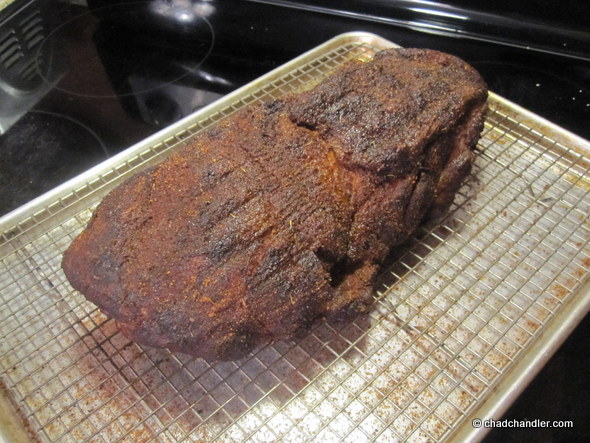
Here’s what it looks like after 4 hours in the smoker:
Baking Overnight
I preheat the oven to 225°. I sprinkle another coat of spice rub all over the shoulder. I place the pan in the center of the oven and throw a half-cup or so of water directly onto the bottom of the oven. This is an old bakers’ trick to create a steam chamber. Then I let the pork cook while I watch TV or read or whatever. This uncovered baking step isn’t really necessary, but I think it helps to develop a more complex bark. I do it when I have the time and skip it when I don’t.
After a couple of hours, I’m usually ready for bed. I take the pork out of the oven, pour a little apple juice over it, and wrap it tightly in foil. I place the foil-wrapped shoulder back on the baking pan and put it the oven. I set the temperature to 190° and go to bed.
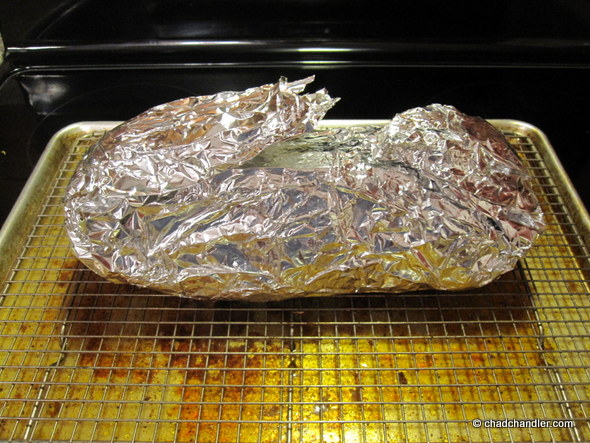
When I wake up, I flip the shoulder over so that the rendered fat can flow back over all of the meat, basting it in the process. You can let this thing cook at 190° for as long as you need as long as it’s wrapped up tightly.
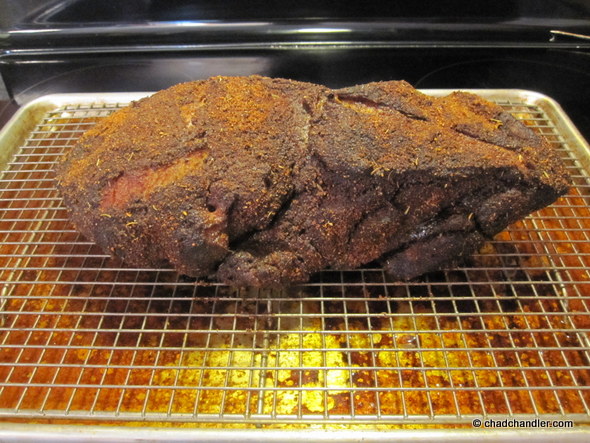
This is what it looks like when it comes out of the foil. The interior of the meat usually plateaus around 160-170° at this stage, which is when the collagen breaks down and the meat becomes tender.
Rebuilding The Bark
About 2 hours before you want to serve the barbecue, take it out of the oven and open the foil. Stand back while the steam escapes. I slowly roll the shoulder out of the foil and back onto the rack on the baking pan. While it’s rolling, I dust it completely with another thin layer of rub. Then it goes back into the oven at 350° for around 45 minutes. This step re-hardens the bark and helps to finish cooking the pork.
After 45 minutes, turn the oven from bake to low broil (or broil at 350° if you can set the temperature). The pork should remain in the center of the oven. After 45 minutes under the broiler, take the shoulder out of the oven and let it rest, uncovered, for at least 30 minutes.
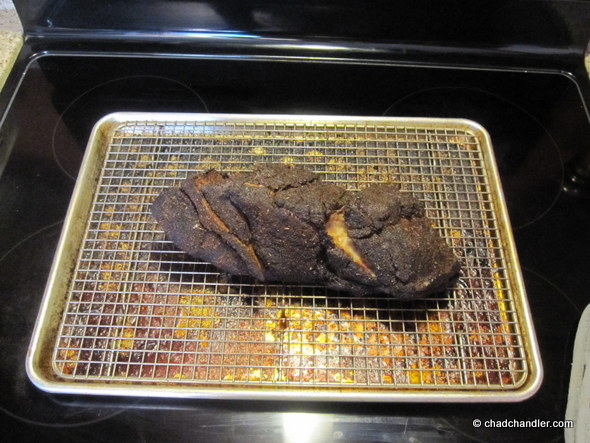
It should be looking pretty damn good by now. This is when the interior reaches around 190° and a lot of fat and moisture render. The pork shoulder should have shrunk considerably since it was removed from the foil.
If the crust hasn’t hardened properly, put it back in the oven for 15 more minutes with the oven door cracked to let the steam escape and keep the heating element active. I keep a digital thermometer in my shoulder, and when the alarm goes off at 190°, I crack the oven door. That way, the crust keeps developing without drying out the shoulder.
Pulling The Pork
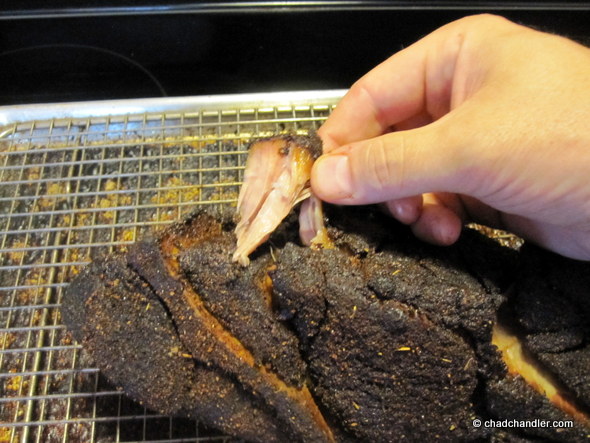
Finally, use your hands to pull the shoulder muscles apart. The wife is really picky, so I pull the meat into thick strands, removing any fat and gristle in the process. You’ll probably discard about a pound of fat and bone.
Eat!
Serve with white bread or buns and whatever fixin’s you like. I like to dip my barbecue in a little SC-style barbecue sauce, but the wife likes a thin, western-NC-style sauce. That recipe is below.
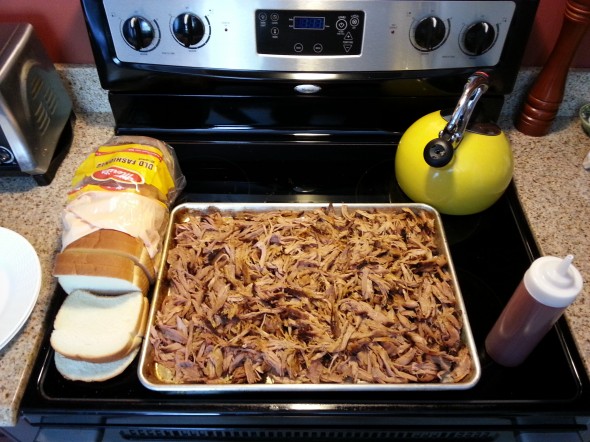
Just pour that sauce into a squirt bottle and let your guests add as much or as little to their plate as they desire.
North Carolina-Style Barbecue Sauce
- 1 cup apple cider vinegar
- ½ cup white vinegar
- ½ cup plus 1 tablespoon ketchup
- 1 tablespoon light brown sugar
- 1 teaspoon table salt
- 1 teaspoon rub
- ½ teaspoon cayenne pepper
Just whisk everything in a bowl until the sugar and salt dissolve. I usually mix this when I take the foil off the barbecue. That way, it has a couple of hours to balance out. If you taste it early, it’ll seem too sweet. It takes a while for the heat to come through. If it’s not hot enough, add a dash or two of hot sauce.
Notes
Barbecuing is a little time-consuming, but it doesn’t have to be very difficult. This technique is the easiest and cheapest way I know to do it. Aside from checking on the pork every half-hour during the smoking process, there’s really nothing to it. And by doing the smoking the day before, you have the flexibility to spend the morning preparing your side dishes. As long as the pork has reached an internal temperature of 190°, you can leave it wrapped in foil on the kitchen counter for several hours while you bake other items. The higher it goes above 190°, the drier it will get.
If you already have the spice rub, wood chips, and charcoal, you end up with around 5 pounds of perfectly cooked barbecue for under $15 bucks. Most BBQ joints charge between $8-10 per pound. Plus, this recipe is easy to double or triple if you’re cooking for a crowd.
If you like really finely shredded pork, then remove the fat and toss the chunks of pork into your stand mixer. Set the paddle attachment to 4 and let it do the work for you.
That’s it. Good luck, and let me know how your barbecue turns out.


Pingback: Basic BBQ Pulled Pork | Chad Chandler
Pingback: Memphis-Style (Dry Rubbed) Baby Back Ribs | Chad Chandler
Pingback: 20 Grill & BBQ Recipes | Chad Chandler
Thanks for recipe! Sounds perfect. I’m from western NC, but unlike your wife, I prefer the eastern NC BBQ sauce. It’s kinda, sorta, you know? like SC BBQ sauce. I love your writings and style on this blog.
Pingback: Homemade Corned Beef | Chad Chandler
Pingback: Fuse Method BBQ Cooking | Chad Chandler
Pingback: BBQ Beef Ribs | Chad Chandler