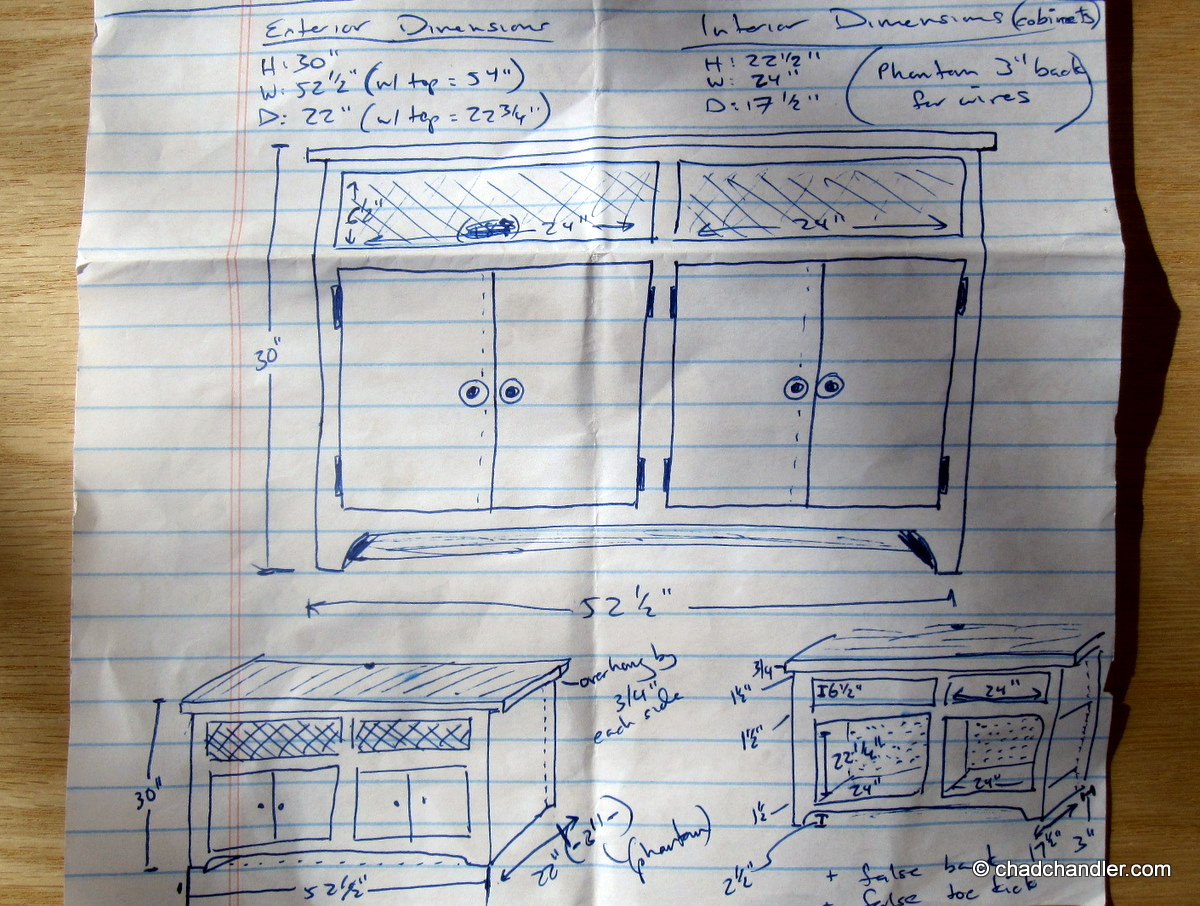
Like I said before, I used the dimensions of my new Home Theater Personal Computer (HTPC) components to sketch out a plan for a multimedia console that would allow cool air into the storage space, block most of the light from bleeding into the rest of the room, and neatly store everything without showing any wires. This was my plan. My measurements had to be cut down by a couple of inches during the build, but I stayed pretty true to the original design.
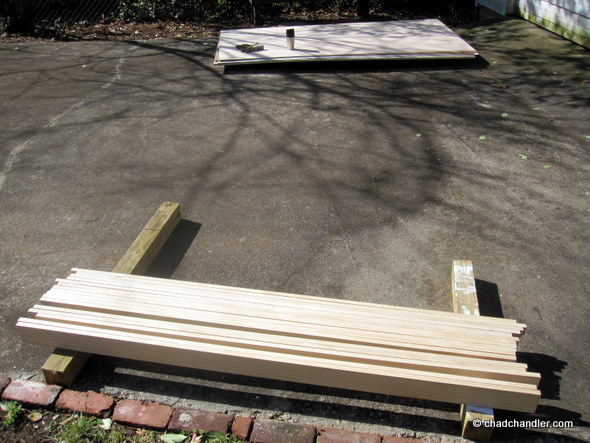
Here’s all of the lumber. Since I was planning to paint the console, I got away with using select pine and plywood for the base and birch for the top. The whole thing cost around $325 to make, including the paint and the hardware. Look at this lumber pile. It just looks like work, doesn’t it?
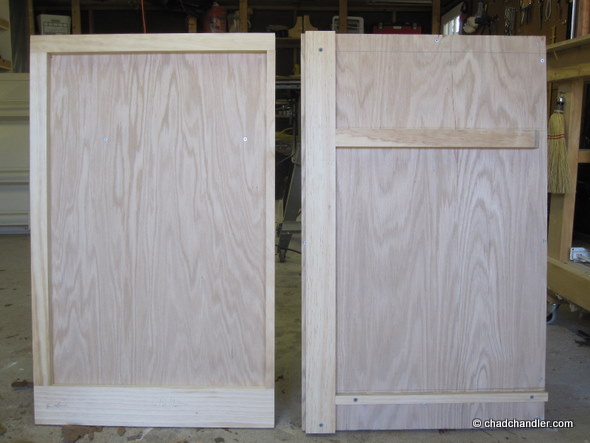
I decided to just glue and screw the plywood to the side beams without any channel routing. Furniture like this isn’t difficult to make from a carpentry standpoint. It’s mostly 90° angles. The trick is anticipating how it’ll all come together and assembling everything in the proper order. I build things in my mind from top to bottom several times over before I buy any materials. As you can see, I had to plan several steps ahead with the sides panels, which support much of the console’s weight.
Then I attached the front slats directly to the sides and the console took shape. By doing it this way, I saved a ton of time. The frame came together in seven hours. I probably could have done it in half the time if I’d had a helper.
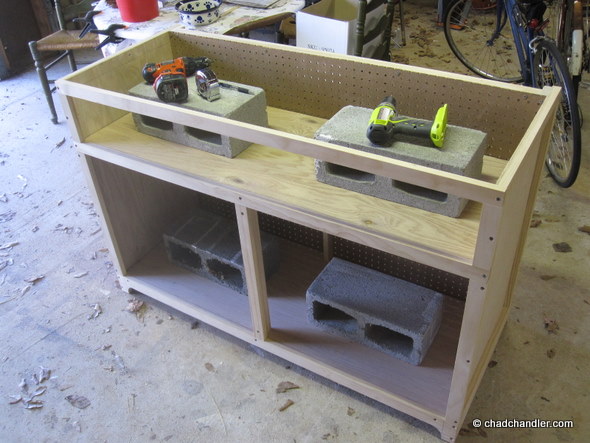
Next, I cut the top piece and routed a 45° angle on the underside of the lip to give it a little embellishment. There’s a false back that leaves 2½ inches of free space in the back of the console to allow for airflow, to dissipate light, to muffle noise, and to hide the myriad wires. I made it out of pegboard.
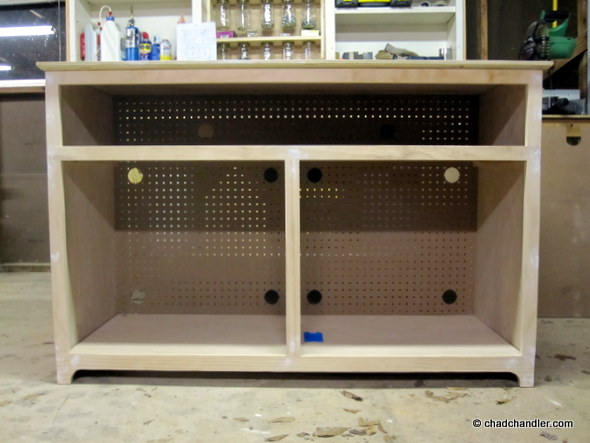
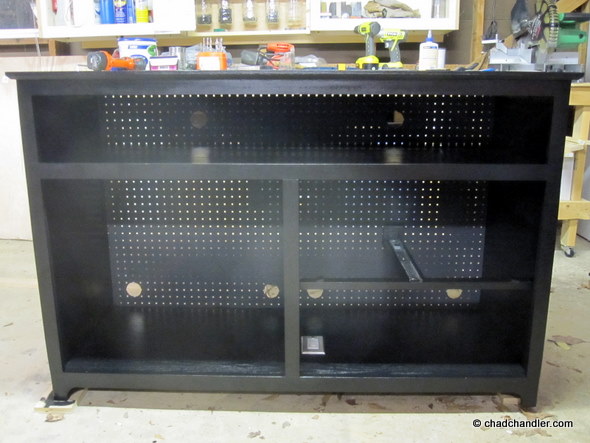
Once the everything was built, I added a sliding shelf for the printer and a shelf to hold the router and additional small components, respectively. I used a tinted primer to cut down on the final paint job. The softwood soaked up an entire quart of primer. Then I glued, screwed, and caulked the top piece to the base and painted it all with glossy black paint. This is the step that I dread in every project. Contorting yourself to get an even coat of paint in all the nooks and crannies of a piece of furniture strains muscles you didn’t even know you had.
I made the cabinet doors by gluing the slats together first. Over the years, I’ve learned that this is best done on the kitchen table over wax paper. My workbench and the garage floor are simply not level enough to ensure a good result.
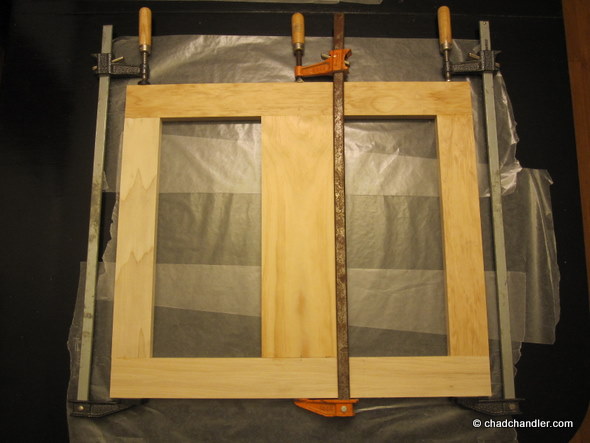
Once the glue was dry, I routed the backsides of the frames and glued (and later caulked) plywood into the channels, making sure that the grain followed the same direction as the plywood on the sides.

After a quick sanding, I hung the doors. That might seem premature, since they weren’t painted yet, but I figure it’s easier to manage two pieces than four. I should add that I hate making and hanging doors. You can ruin an otherwise perfect piece of furniture with warped or uneven doors. I spend long periods of time at the hardware store laying slats on the ground and checking them for any signs of warpage or curvature. It’s kind of like this movie scene. Sometimes, cabinet doors look perfect for months until the seasons change and then a corner starts to lean away from the frame. It never closes properly again after that, and people will walk by and try to nudge it closed, even though it is closed. That’s like salt in the wound for me.
I attached the hinges to the door sets and the wife held them in place as I drilled the holes for the screws. Then I removed the doors, detached the hinges, and cut the doors in half on the table saw. They’re marked so that I know which door goes where on the console. Since everything was pre-drilled, the finished doors were easy to install in exactly the right position. I added some rubber pads to keep the doors from slamming, but since the doors close against the frame, I didn’t have to install door catches. That’s a nice reprieve. I hate installing door catches.
I remembered to brand the underside of the console.

UPDATE: Building An HTPC Console, Part 3


