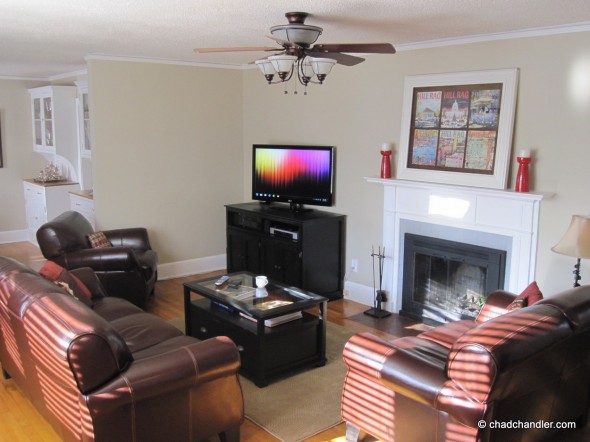
Like I said in my previous posts (part 1, part 2) I’ve been waiting for several years to pull the trigger on a Home Theater Personal Computer (HTPC) set-up. I wanted to fit everything ‘multimedia’ into a custom console in my den that kept my entire system streamlined, organized, and hidden from sight. This is how it all turned out. I’m very pleased with how clean the design looks in the room.
These pictures aren’t great. I think I got some dust on the camera lens when I was out in the workshop. Click on the first image to enlarge. It may take a moment to load, then use your right arrow key to advance:
Thanks to the false back I built into the console, you can’t see any wires except for a neatly-wound bundle that goes from the back of the TV through the backer-board and into the console. And I included a 2½ inch space beneath the unit to hide a couple of squid-like surge protectors and extension cables. During the build, I installed a toe kick that allows for airflow from the front of the unit so electrical heat shouldn’t be a problem.
As you can see, the printer is on a drawer that slides out to make it more accessible. The cool thing is, we can print over the air from our smartphones and laptops and anywhere in the world via Google cloud print. I don’t think we’ll use it much, but I guess it’s nice to have the option. And since it’s wireless, the wife can simply put it on the kitchen table when she gets the itch to print a bunch of photos and cards.
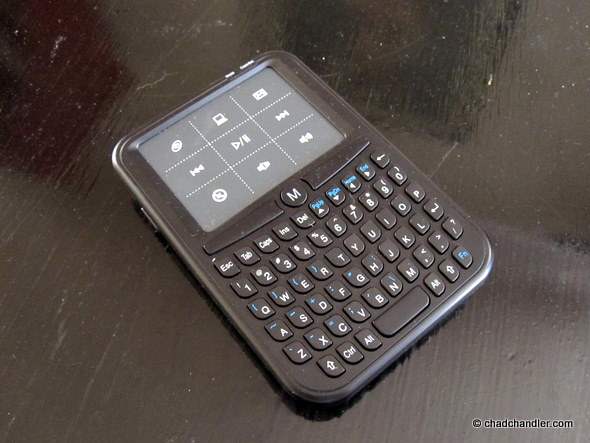
Since I didn’t put a vertical support beam in the upper chamber like I originally designed, I was able to keep my left, center, and right speakers symmetrical. If you look closely at the picture with the red circle, you’ll see a little USB dongle between the center speaker and the A/V receiver that runs down to the back of the PC and relays the signal from the HTPC remote. That way I can wake and control the computer without ever opening the cabinet doors, and it works from anywhere in the room. And when I say anywhere, I mean it. You’ll lose the ability to see the mouse arrow before the mouse stops reacting to your commands. The remote is like a big blackberry. It’s very easy to use, but back-lit keys would have made it even better.

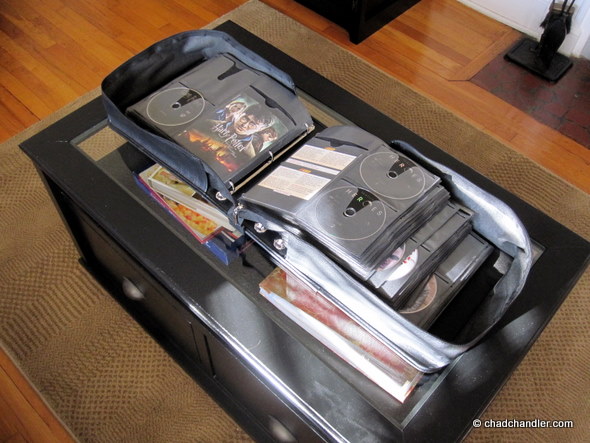
It’s amazing to think that I fit my DVD collection in this one organizer. It’s even more amazing how light it is. Most of the weight is in those unnecessary plastic cases. I thought about burning all of my DVDs onto a hard drive, but it’s just not very practical with today’s technology, especially Blu-Ray discs. This is the next best way to save space. I bought some extra inserts, so this should last me for life. Most movies will be digital purchases from now on.

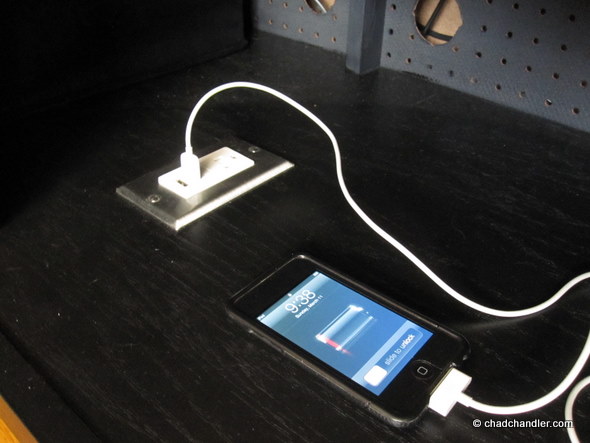
To make recharging less messy, I built an electric socket with two USB power ports directly into the floor of the console.

All in all, I think this piece came out great. The cabinet doors aren’t perfect, but the mistakes are small and hopefully only I will notice. I wish I had made the console about six inches shorter, but I can can live with the height. This might be the most square/plumb piece of furniture I’ve made ever made.
I pretty much had this same idea six years ago when I built my computer desk. So much has changed technologically since then that my computer desk is now obsolete (I actually planned for obsolescence, building it so that certain parts can be removed to transform it into an open secretary desk). That desk was the first really complex piece of furniture I ever built. I’ve come a long way too since then, managing to crank this project out with a mere 20 man-hours. Moreover, this console is both lighter and cheaper than the computer desk without compromising strength, and it’s more effective without compromising attractiveness.
A Technical Note
You might notice that this HTPC set-up is a space-waster, has redundancies, and isn’t as advanced as it could be. That’s true, but I’m trying to get the maximum possible output with the minimal possible input. There are a handful of OS/software/web-based solutions that would take this to the next level, but they’re so far from being all-inclusive and user-friendly that I just don’t feel like wasting my time with them.
I’m going to play around with Windows Media Center, Kylo, and maybe MediaPortal. But, let’s face it, we’re still at least 5-10 years away from an intuitive, all-inclusive HTPC platform. There’s too much DRM ambiguity, too many fractional platforms, and the software and hardware aren’t nearly integrated enough to aggregate and deliver content better a few disparate services can.
I’d love to try Boxee, but I’m not shelling out $170 just to play with it. I’d rather buy a 1080-supportive TV tuner and try using Windows Media Center as my cable box/DVR. That, combined with internet content in one UI, might be the best solution for now.
Think I’m wrong? Am I missing a major piece of the puzzle? Tell me about it in the comments.
Did you land on this page? Go back and see the previous posts in this series: part 1, part 2
UPDATE 1: Cutting The Cable Cord
UPDATE 2: And only years later, this piece of furniture is now a dining room buffet.


this is absolutely AMAZING. chad, you are so, so talented! i can not believe you made this in 20 hours…i am absolutely blown away. i can’t believe it!
Remember, that’s 20 man hours. It took me two weeks from start to finish. There’s just so much glue, caulk, primer, and paint that has to dry. Add in the fact that I have to do most of this after my real job, and you can imagine how frustrating it gets when it lingers on so long.
I don’t enjoy building this stuff as much as people think. It is work after all. But when it’s done, I’m glad I did it. I waited two years to get a HTPC in place. That’s a long time to go before scratching an itch.
Pingback: A Sampling Of My Homemade Furniture | Chad Chandler
Pingback: On Technology, Tribalism, And The Future | Chad Chandler
Pingback: How and why I’m cutting the cable cord | Chad Chandler
Pingback: Cutting The Cable Cord, Part 2 | Chad Chandler
Pingback: Cutting The Cable Cord, Part 3 | Chad Chandler
Pingback: Dining Room Buffet | Chad Chandler