For Valentine’s Day this year, I surprised the wife with a few bleach art T-shirts. She wanted me to show her how to make them so she can demonstrate it at a meeting of her Sewing And Craft Club. I’m a big Bob Dylan fan, so I decided to make a Bob Dylan T-shirt. Actually, I decided to make two shirts so that I could demonstrate the two methods of single-stage bleach art.
Bleach art is exactly what it sounds like—using bleach to make two-tone images on cheap T-shirts. It’s a fun and easy project that’s safe for anyone who’s old enough to use an Xacto knife.
Here are the supplies you need:
- An ironing board and iron (set to medium heat)
- Cheap, dark-colored T-shirts ($5–$8 each at Target or Old Navy)
- An image/stencil you’ve printed from the Internet
- Freezer Paper (available at any grocery store)
- A fine mist spray bottle filled with equal parts bleach and water ($1 at Hobby Lobby)
- Pencil, scotch tape, and an Xacto knife
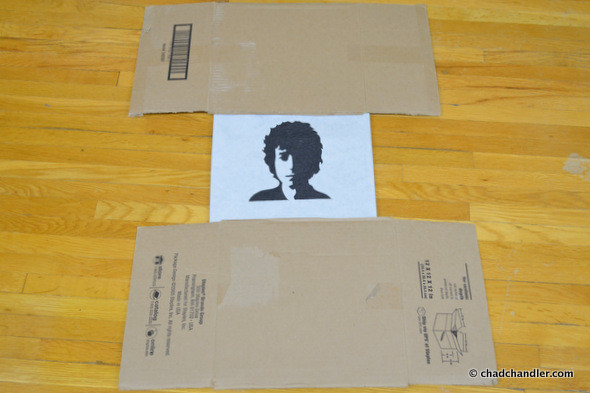
- Scrap cardboard
To begin, print an image from the internet. I just did a Google Image Search, downloaded a picture I liked, and printed it at the right size for a large T-shirt. Next, I taped the picture to a cutting mat (you could use a kitchen cutting board or a cookie sheet) and taped a piece of freezer paper over that.
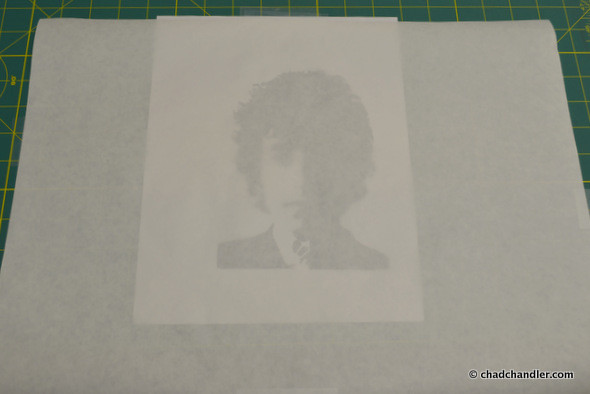
Freezer paper has a parchment side and a waxy side. You want the waxy side to be facing down and trace on the upward-facing parchment side. I actually simplified the image a little bit to make it easier to cut out.
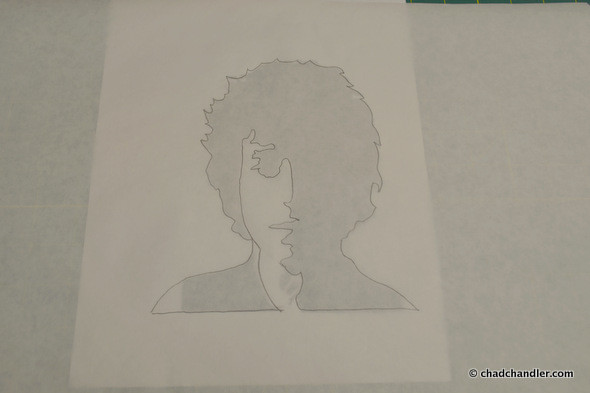
Next, I used an Xacto knife to cut out the inner image. I’ll be using both pieces of the freezer paper, so I was careful not to tear it.
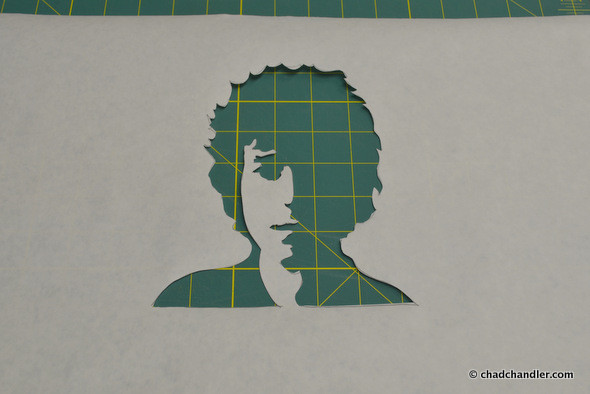
Like I said before, there’s a positive and negative way to make bleach art. The positive way is to use the bleach to color everything inside the stencil. The negative way is to use the bleach to color everything outside the stencil. First, let’s look at how to work with a positive stencil.
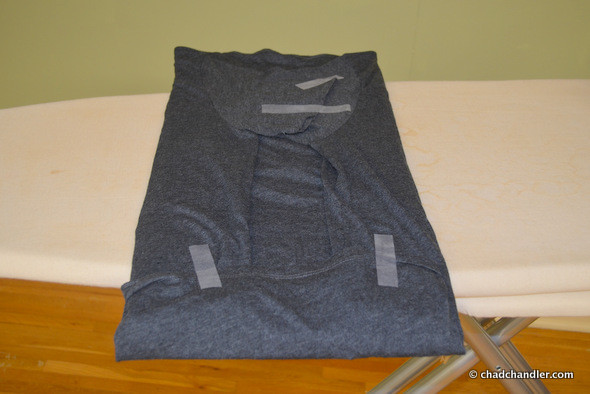
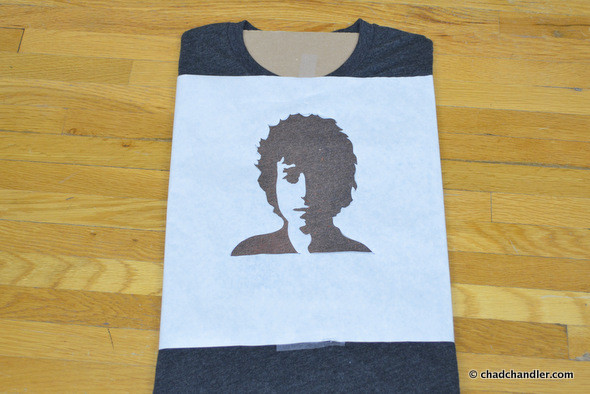
You need to wash and dry your shirts beforehand to remove any coating from the manufacturing process that might interfere with the bleach. Once they’re dry, iron the front of one of the shirts flat. Next, fold the shirt in half and iron it to make crease down the center. This will help with alignment. Shove a piece of cardboard inside the shirt so that the bleach doesn’t seep through to the back. Since this is a positive stencil, I tape the shirt to help cover all of the fabric.
Place the stencil in the correct place and tape it to the shirt. Wrap the excess paper around the back to keep it bleach-free.
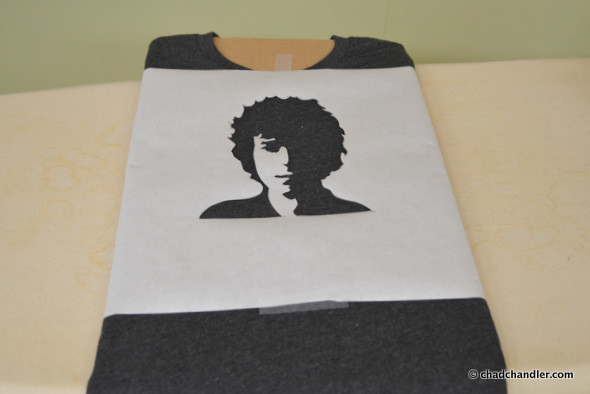
Next, iron the freezer paper to the shirt. The waxy face will melt a little under the heat of the iron, gently adhering it to the fabric. This will keep the bleach in line.
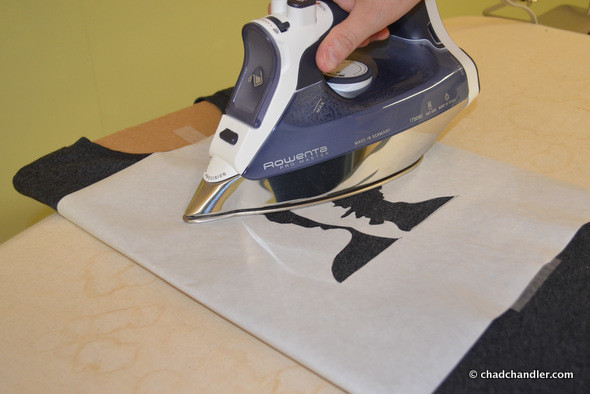
Cover any exposed shirt material with scrap cardboard. We only want to bleach inside the stencil.
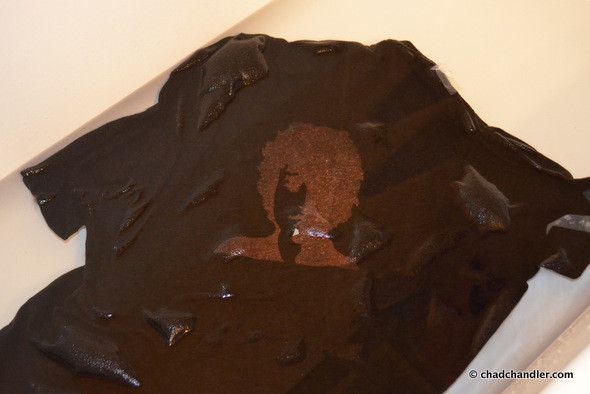
Finally, spray the stencil area with an even mist of the bleach/water mixture. Resist the urge to spray too much. Time is the main factor here. The bleach will do its job. The longer you leave it on the fabric, the lighter the area will get. Only add more bleach if it seems to be fading unevenly.
It’s hard to tell how much the color has faded because the fabric gets darker when it gets wet. You can remove the extra cardboard to compare the stenciled area with the unbleached fabric, but understand that it’s probably faded to a lighter shade than it appears. When it’s the right color, remove the tape, cardboard, and stencil, and immediately soak the shirt in bath water to stop the bleaching process.
Now let’s make a negative stencil. The same set-up applies—iron the shirt face, make the crease, and stuff it with cardboard. For this shirt, we don’t tape the fabric in the back. We want the whole shirt front to be exposed. Iron the stenciled piece of freezer paper that was cut out earlier onto the shirt and bleach the area around it thoroughly. We want it to fade the most in the center and darken as we move away from the stencil.
When it’s the right color, remove the cardboard and the stencil and immediately soak the shirt.

Finally, wash and dry the shirts like normal laundry.
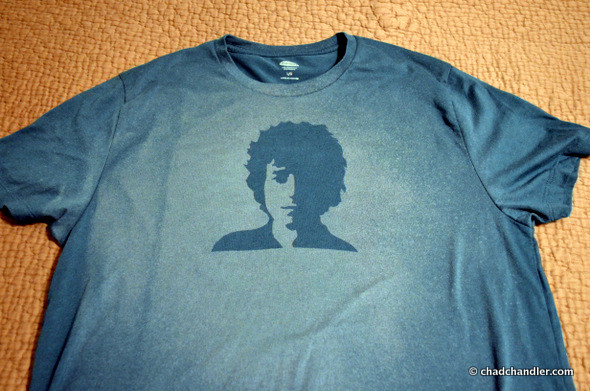
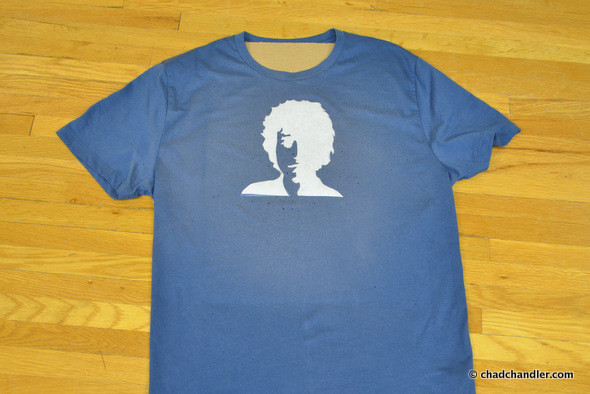
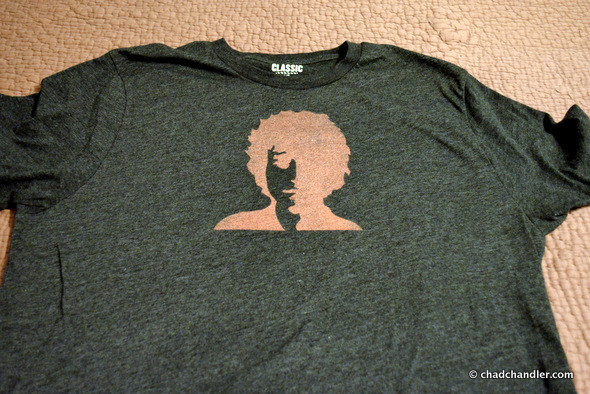
Here are the results. Notice how the black shirt faded to red and the blue shirt faded to gray. I think the negative came out better than the positive. What do you think?
The terminology seems a little confusing in this instance because I used a human face as my stencil. The positive method resulted in a negative image and vice versa. But it would have looked different if I used a solid stencil in my design. Here are some examples.
Even if you ruin a shirt, you’re only out $6. How cool is that? You can make any design you want, from sports logos to holiday themes to pop culture to complex patterns. You can get more complex with layers of bleaching and varying levels of fading. It’s all up to you.


