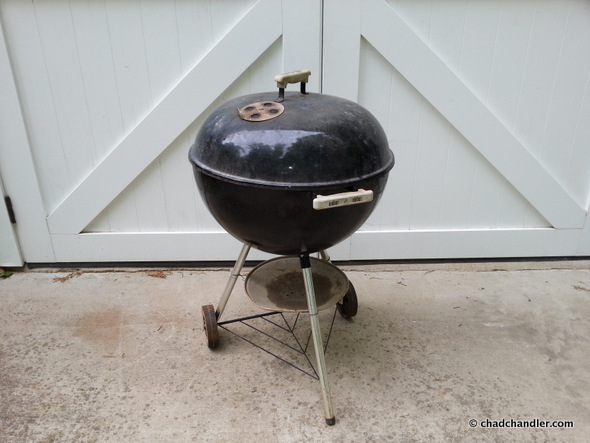
In my last post, I explained that I wanted to create an accessory that would allow me to cook Neapolitan-style pizzas on my kettle grill. My goal was to have the means to make high quality pizzas on impulse (impulse meaning within a couple of hours). And since you can freeze homemade dough for months so as to always have it on hand, all I needed was a reliable tool to do the job. So I bought this used grill for $25 with a mind to cannibalize it for parts.
These were my five goals with regard to the design:
- It must be an all-in-one solution.
- It must allow me to add pizzas to the stone without having to remove the lid.
- It must be easy to add fuel to the fire between cooks.
- It must reach temperatures over 800° and cook a pizza in three minutes or less.
- It must be safe to cook with.
When I say “all-in-one solution,” what I mean is that I don’t want to be juggling several components that all have to work together just right—especially when those components are wreathed in flame. That would be a recipe for disaster. I wanted to make a minimal set-up that would simply fit on top of my existing kettle grill. That way, if I need to add some wood chunks, I can just slide the lid off a little, drop in some more wood, and then slide the lid back on.
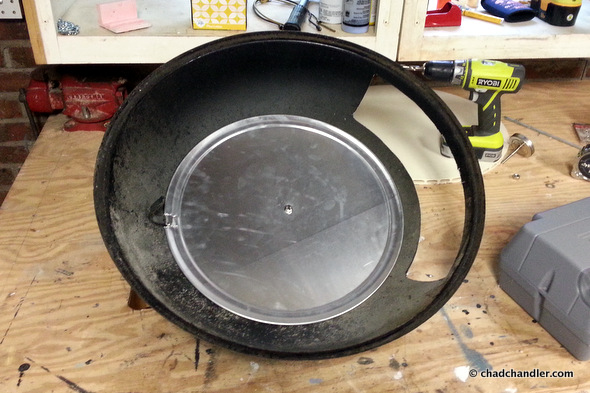
That means that everything has to be incorporated into the lid. That’s where the optimal heat is anyway, right? I think pizza stones are heavy and prone to cracking, so I picked up a CoreLite 20″ full circle shelf from a local pottery supplier. It’s made for electric kilns and it’s food-safe. It has a hollow core for better heat circulation and fits pretty well in my lid.
The idea here is to use the bottom vent in my grill to draw the air that feeds the fire. That hot air flows from the back of the grill, through the gap between the lid and the stone, over the cooking surface, and then escapes through a slot in the lid.
Here are the supplies I was working with:
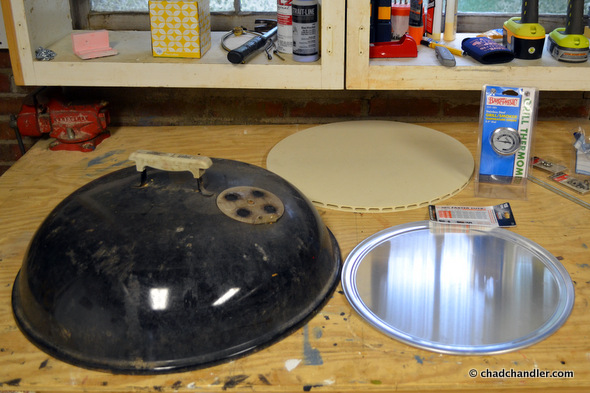
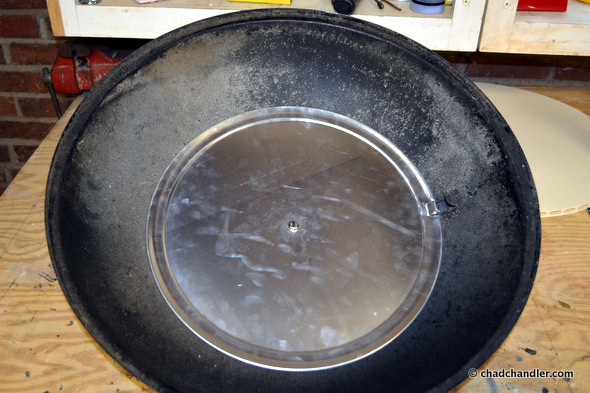
I figured I should work from the top-down. I went to a local restaurant supply store and picked up an 18″ pizza tray for $6. This is meant to lower the dome height so that the hot air is as close to the top of the pizza as possible. I drilled a hole in the lid and in the pan and attached it with a stainless steel screw and nut. If the wood-burning oven somehow burns higher than I expect it will, then I’ll have to swap this aluminum tray out for a steel one or else it’ll melt. I thought about attaching another kiln shelf in the dome to absorb and radiate even more heat, but I didn’t want to add another 10 pounds to the design.
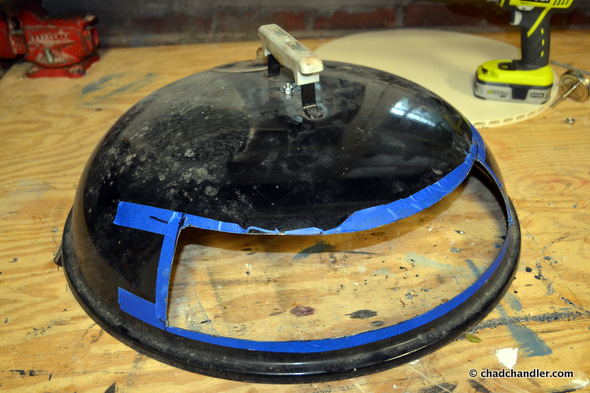
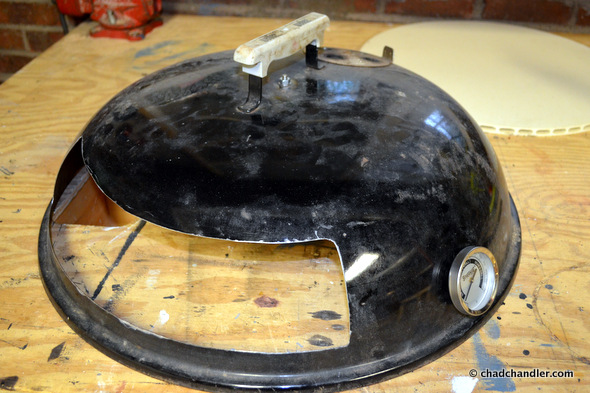
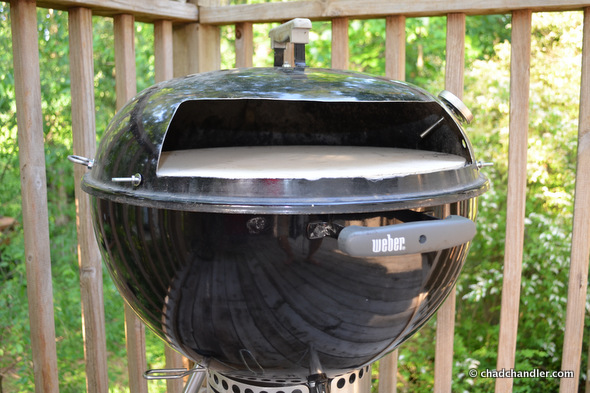
With my ceiling height established, I used a metal-cutting jigsaw blade to cut the vent/door out of the lid and then deburred the edge with my Dremel. The opening is 18″ (measured along the circumference) wide by 3¼” high (vertically, not along the slope). If you measure a straight line from the bottom corners, it’s 15½” wide, which should allow me to load/unload pizzas to/from the stone without removing the lid.
I remembered to tape it to reduce chipping. This is a trick I learned when I used to cut formica.
There’s still a little room to lower the dome height. I’ll have to wait and see if that’s an issue that needs to be addressed. I think a 20″ tray would drop the dome to the top edge of the vent.
Next, I installed a thermometer to measure the heat near the front of the cooking stone (I actually installed the thermometer too low and had to move it higher later on). It only reaches 750°, but it should provide a glance at the temperature in the cooler part of the oven. I’ll need an infrared thermometer gun to gauge higher temperatures. My goal is to get to 900° and hold it long enough to cook a pie or two. If I can’t get it that high, then I’ll just switch from making Neapolitan-style pizzas to making NY-style pizzas.
While I had room to work inside the lid, I also added a hook so that I can hang the pizza oven in my basement when I’m not using it.
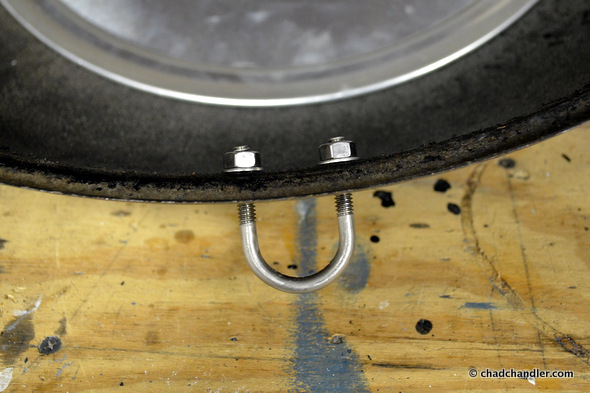
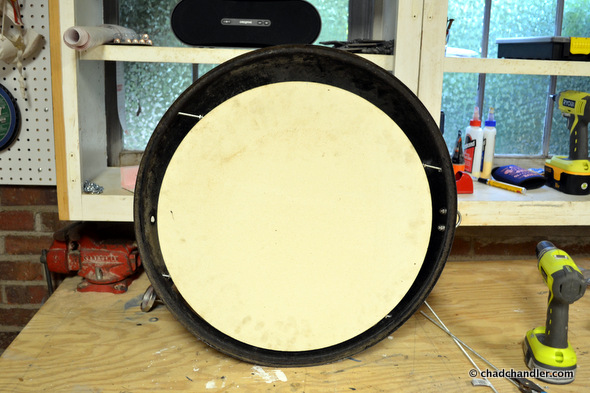
Finally, it was time to secure the cooking surface. Because the CoreLite kiln shelf has hollow chambers, I was able to drill four holes in the base of the lid and run threadings through two of the chambers to secure it to the lid. I used some nuts and washers to keep it from wiggling. All of the hardware used in the build is stainless steel, so it’s free of zinc.
What I have here is essentially a brick oven that pops on top of a standard 22.5″ Weber kettle grill. The components add an extra eleven pounds, so it’s about the weight of a large pork shoulder or a small brisket. That’s not unreasonable or dangerous to use in conjunction with a kettle grill.
I can hang my oven on the wall in my basement and swap it out for my standard lid whenever I want to make pizza. The hardest part was measuring exactly where to drill the holes, but now that they’re in place, the oven will be easy to tear down and put back together in case anything needs to be cleaned or replaced.
Costs
$25—Extra grill
$50—CoreLite kiln shelf
$15—Thermometer
$6—Pizza tray
$14—Hardware
That’s $110 to more or less replicate the $475 KettlePizza. The only thing left to do is to test it.
UPDATE—Modified Kettle Wood-Fired Pizza Oven, Part 3


Pingback: Modified Kettle Wood-Fired Pizza Oven, Part 3 | Chad Chandler
This looks like something I want to do. I have been thinking about a kettle pizza oven but like your one stop plan.
Very Cool! Am looking to do the same thing. Wanted to know some more details about how you attached the stone. Is it one long threaded rod? If so how long was it? And how long of a bolt did you use on the pizza tray.
Thanks!
Yes, I bought one 4′ threaded rod and used a hacksaw to cut it into two pieces. I had some left over. I can’t remember about the bolt. I think it was 1 1/2″, but it might just be 1″. Best of luck.
We had some neighbors leave of these Webers on their trash pile that we picked up for free. It had been dropped but about 5 minutes with a hammer straightened it up and I think this will be the next step. Thanks for the write-up, I’m excited to do this conversion now!
Love the design, super easy! Would there be an advantage to using a propane burner vs charcoal?
If you wanted to go that route, then you should just buy a Blackstone Pizza Oven. I’ve heard great things about them!
Chad, I am going to try this on an old Weber. Did you just hand cut the lid with a hacksaw? I purchased a single blade hacksaw with a metal blade for like $7. One final question. Did you drill holes in the corners to get rounded edges and to get the cut started? Thanks!
I drilled a hole to drop in my metal-cutting jigsaw blade and cut it with the jigsaw. It was VERY loud. This could be done with a hacksaw, but it would take a long time since you would only be able to cut a little at a time. Good luck!
Now that you have used it for a while… is the aluminum tray that you used to lower the lid still working or did it eventually ‘melt’
Chad, very noble and amazing work!! If you allow me, I was thinking of one more enhancement. I am contemplating if charcoals (or fuel in your term) can be added without lifting the modified lid (which potentially loses a significant amount of heat). So, I am thinking some way to insert coals to the bowl and we would need to make modifications to the bowl. Let me know what you think.