The wife and I have been busy experimenting with my homemade pizza oven. In a perfect world, I’d have ten lids and make a series of ovens, each one an improvement over the last. But we don’t live in that world, so I’m figuring out how to best cook in this oven.
As I said before, my pizza oven is designed to utilize both charcoal and hardwood to reach temperatures necessary for Neapolitan-style pizzas. I’ve been practicing and have pretty much nailed Neapolitan-style pizzas. There’s room to improve with the dough, but I know how to work the oven at high heat.
I'm getting better at cooking in my homemade wood-burning pizza oven. pic.twitter.com/uXQgLg9unt
— Chad Chandler (@chad_chandler) May 25, 2014
By using charcoal alone in my oven, the heat can be ratcheted down to make New York style pizzas. That’s what the wife and I decided to do this past weekend.
I’ve tried variations in the amount and placement of the coals in the grill. I’ve found that I get the optimal amount of heat by pouring a full chimney of burning charcoal over a half chimney of unlit coals. I mound the unlit coals in the center and then spread the lit coals in an even layer throughout the bottom of the grill. I wait 20 more minutes and then I have a steady heat source that will last a long time.
With the bottom vent wide open, the temperature maxes out just under 700°. By adjusting the bottom vent, I can maintain any temperature I want below that. In fact, I’ve been amazed at how fast I can starve the fire by closing the vent completely when I’m done cooking. I can actually use the half-burnt coals in the next cook.
When I add wood to the coals, the tops and the bottoms of the pies cook at the same rate. Without the wood, the stone gets a little hotter than the dome. I’ve tried banking the coals at the rear of the grill, but that only increases the cook time, inviting the crust to burn. I’ve found that the best way to mitigate the uneven cooking is to start the pizzas in a pan and then finish them on the stone, kind of like the reverse sear method for steaks. This also happens to be the easiest way I’ve found to build the pizza.
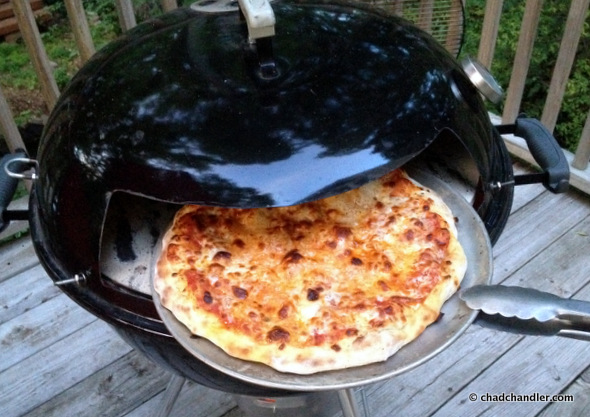
We’ve mastered using an aluminum pizza peel (I haven’t seen the need for a wooden peel at all), but it’s even easier to just make the pizza in a tray, toss the tray in the pizza oven, rotate the pan with a pair of tongs, and then slide the pizza out of the pan for the last bit of cooking.
I threw some dough together on Saturday morning and placed it in the fridge to cold ferment. NY-style dough is different than Neapolitan-style dough in that it’s meant to be thicker and sweeter with more chew. On Sunday night, I cooked a pizza sauce based on this recipe and fired up my charcoal. I also grated some high moisture, whole milk mozzarella (which is surprisingly difficult to find).
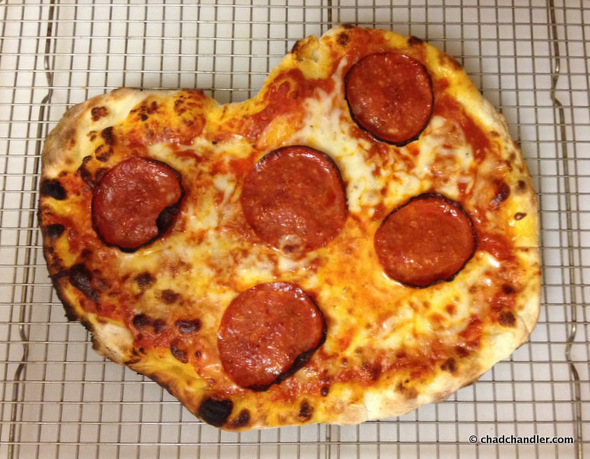
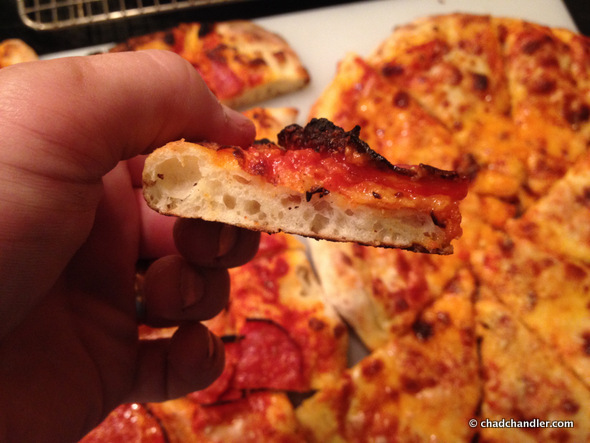
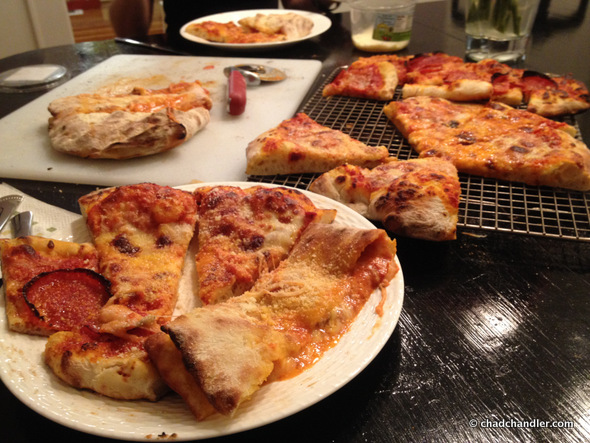
Our first pizza was a standard pepperoni and cheese. I started it on the stone and then moved it to the pan. It charred a little on the bottom, but it was still very good. Check out the rise I’m getting out of my dough. It’s airy, but not too thick. Sorry for the bad cell phone pictures.
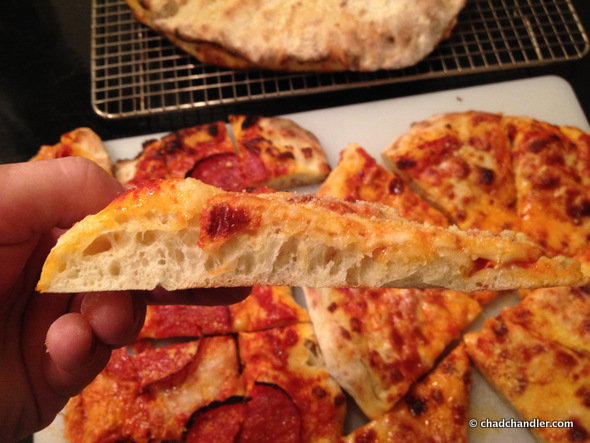
The second pie was made with red sauce, a very sparse sprinkling of mozzarella, and then was covered with deli-sliced provolone. This pie was cooked completely in the pan and could have used a minute on the stone, but was pretty close to perfect nonetheless.
The wife and I have started a new tradition. We stretch the smallest dough ball, throw all of the leftover ingredients onto it, and cook it as a calzone. It makes clean-up a cinch. I started the calzone in the pan and finished it on the stone. Sadly, I didn’t remember to take a good picture of it. The wife is a bit of a calzone snob and she said this was the best one she’d ever eaten.
I feel like I’ve finally used the oven enough to get a feel for cooking on it. Now that we’re making reliably good pies, it’s probably time to have some people over to share in this embarrassment of edible riches.
Next time I make NY-style pizza, I’m going to try forming a ring of unlit coals around the inner circumference of the grill. Then I’ll pour the chimney full of lit coals over the ring of unlit ones and keep the center free of coals altogether. Because of the draft around the stone, I might be able to increase the dome temperature while decreasing the temperature of the stone itself. That may give me an even cook at 650°. If I can accomplish that, as well as stretch my dough a little thinner, I think I’ll be making the best pizza in Greenville, SC.
UPDATE 9/18/2014: It’s only been a few months, but I’ve pretty much mastered how to cook pizza in my homemade grill oven.
- Click here to see pictures of the kinds of pizzas I’m routinely making at home.
- Click here for a step-by-step tutorial on how to make these pizzas yourself.


Pingback: Homemade Canadian Bacon | Chad Chandler
I have a 25 year old Weber, and just obtained a new one so was thinking about modifying it for Pizza.
Like you I thought it was odd that most modifications involve raising the lid, so was considering cutting the slot directly into the lid which is how I found your blog. Very interesting.
I’m going to try just cutting the slot initially, with no other permanent modifications. I will raise the stone into the lid from the grate below, and feel this will give more flexibility to experiment with heights etc.
It will be interesting to compare my results with yours, particularly since my lid ceiling won’t be lowered like yours but I can always do that later.
So, I’ve just extracted the first four pizzas from my newly created Frankenwebber or whatever we want to call it, and must say I’m really impressed. Tops and bottoms of the pizzas done to perfection in about 5 mins.
The slot that I’ve cut into the front of my lid with the jigsaw looks very similar to yours, only slightly narrower and higher. I figured that if I wasn’t going to lower the ceiling I should cut the slot as high as I could.
The cutting was easier than I expected, it only took about five mins, but glad I had some ear defenders. I notice that the lid on the older Weber is definitely slightly thicker than the new one I’ve just bought. I positioned the thermometer in the same place you have yours.
So charcoal in chimney, then banked on the bottom grate at the back. Top grate on, couple of bricks on that and then pizza stone on top. After about 15 mins the temp was at 360°C and it stayed there for about 45 mins without doing anything else. I noticed that when I closed the Webber vent the temp dropped 10°C or so, so I kept it open. This is a benefit of not lowering the roof, the top vent still functions.
Anyway, I don’t envisage that any more modifications are necessary. Just a normal Webber with a slot cut in the lid. With the temperatures achieved it could still function as a normal bbq, but I’ve got the new one for that.